Step-by-Step DIY Boat Repair With Marine Epoxy

Boat maintenance might seem like a daunting task, especially if you’re faced with a repair that appears complex at first glance. That’s why we’ve crafted this guide to demystify the process of DIY boat repair using marine epoxy, making it accessible for boat owners of all skill levels.
Whether you’re dealing with minor dings or more significant cracks, this powerful adhesive provides a versatile, durable solution that can restore your vessel to its former glory. We’ll walk you through a step-by-step approach that discusses the essentials of using marine epoxy, ensuring your DIY boat repair project is successful and rewarding.
Step 1: Assess and Determine the Extent of Repairs Needed
Start off step one by grabbing a notepad and a flashlight and giving your boat a thorough examination, both inside and out. Look for any signs of wear, such as cracks, holes, or areas where the fiberglass has become compromised.
Don’t overlook small dings or scratches, as these can worsen over time. Once you’ve identified all areas that need attention, you can make a list and prioritize the repairs.
Step 2: Thoroughly Clean the Damaged Areas
Before you can begin any actual repair work, it’s essential to make sure the areas in need of repair are clean. All you need is some soap and water to remove any surface dirt and grime. Once that’s done, switch to a more specialized cleaning solution that’s suitable for your boat’s material, be it fiberglass, metal, or wood.
Apply the cleaner generously and scrub thoroughly; you want to get rid of not just the dirt but any oils or residues that might interfere with the adhesion of the marine epoxy. After cleaning, rinse off the soap and cleaning solutions completely and allow the area to dry fully.
Step 3: Sand the Damaged Surface To Roughen the Texture
Gently yet firmly sand down the damaged areas using medium-grit sandpaper. The goal here is not only to smooth out any rough edges but also to create a slightly rough texture. Marine epoxy adheres best to surfaces that aren’t completely smooth.
Think of it as giving the epoxy something to grip onto. Be thorough but careful; you don’t want to inadvertently create more damage by sanding too aggressively. Once you’re done sanding, wipe away the dust with a clean, dry cloth, ensuring the surface is perfectly prepped and ready for the next step.
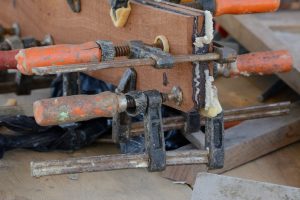
Step 4: Use Precise Measurement and Thorough Blending To Mix the Epoxy
First things first, ensure you’re working in a well-ventilated area, as safety always comes first. Begin by reading the instructions on your marine epoxy package carefully; each product can have slightly different requirements for mixing ratios.
Generally, you’ll be dealing with two components that need to be mixed: a resin and a hardener. Accuracy is key; use measuring cups if possible to ensure you get the proportions just right. Then, use a mixing stick to blend the two components together until you achieve a consistent, homogenous mixture. Once the components are completely mixed, you’ll have a limited working time before the epoxy starts to set, so make sure everything else is prepared and you’re ready to go on to the next step.
Step 5: Apply the Epoxy to the Damaged Areas Using a Suitable Applicator
With your marine epoxy mixed and ready, it’s time to get down to business and apply it to the damaged areas. Choose an applicator that suits the size and nature of the repair. A putty knife works well for wider cracks, while a syringe might be ideal for small, precise applications.
Start by applying a generous amount of epoxy, ensuring you completely fill the damaged areas. Then, use your applicator to smooth out the surface, blending the epoxy evenly with the surrounding area. This step not only reinforces the damaged spots but also significantly improves the aesthetic appeal of the repair, making it look as good as new.
Step 6: Allow the Epoxy To Cure
Once you’ve applied the epoxy and smoothed it out to your satisfaction, the next step is all about giving it time to work its magic. It’s like baking a loaf of bread; you’ve done all the hard work mixing and kneading, and now it just needs time to rise. Similarly, the epoxy needs time to cure. This process is not one to rush.
Depending on the specific marine epoxy you’ve used, curing times can vary significantly, so it’s important to refer to the product instructions for precise timing. Some may harden within a few hours, while others might need to cure overnight or even longer. During this time, ensure your boat is in a safe, dry place, away from direct sunlight or any potential disturbances.
Step 7: Sand the Repaired Areas for a Smooth, Seamless Finish
This step is where your efforts start to show, quite literally smoothing out any rough edges in the process. Begin with medium-grit sandpaper to knock down any high points or noticeable overfills of epoxy, being diligent yet gentle to prevent undoing any of your previous work.
Gradually move to finer grits to meticulously blend your repairs with the surrounding boat surface. It’s this attention to detail that can make the difference between a DIY repair that’s glaringly obvious and one that’s virtually undetectable. Finally, wipe away any remaining dust with a tack cloth or a slightly damp rag, revealing not just a repaired boat but a reflection of your growing skill set.
Step 8: Apply a Protective Coating
Now that you’ve meticulously prepared and repaired your boat, the final step is to apply a protective coating. This is your boat’s shield against the elements, serving both as a protective layer and enhancing its aesthetics.
Select a marine-grade varnish or sealant, making sure it’s compatible with both the material and appearance of your boat and the epoxy you’ve used. Use a clean brush or roller, and work in consistent, even strokes to cover the area. This step not only safeguards your hard work from water, UV rays, and wear but also gives your boat a glossy, polished finish that looks professional.
While this step-by-step guide to DIY boat repair should help you achieve a seamless finish, you can’t start your project without high-quality marine epoxy. At Brampton Technology, our underwater epoxy for marine applications is specifically formulated to handle any rough waters you might encounter.